


I rebuilt the guide train on my trolling rods and measured the difference. Friction, rod twist, line life, and the spiral wrap test. 🎣
Guide Train Layout for Trolling Rods: Drag Reduction Design
I lost five king salmon in one morning because of a guide ring the size of a lentil.
Not a bad knot. Not a bad hook. Not a fish that simply threw it. A tip-top I had wrapped in a hurry the night before, one size too small for the leader I was running, and every time a fish took line I could hear it. Tick. Tick. Tick. Like a tiny metronome counting down to a lost fish. 🔧
Five of them. Same sound. Same result. I did not work out what was happening until the fourth one, which is either a testament to my persistence or a fairly damning note about my powers of observation. You decide.
That morning is why I now care about guide trains more than I care about any other single component on a trolling fishing rod. Not the blank, not the reel, not even the line. The rings. Because they are the only part of the entire system that actually touches your line, and everything you feel, everything you lose, and everything you land goes through them.
This is what I have learned over four seasons of building, rebuilding and measuring. Some of it I measured properly. Some of it I measured badly. I will tell you which is which.
Key takeaways (if you only read one section)
- A guide train is a fluid system, not a row of rings. Its job is to take the wide, oscillating cone of line coming off a big trolling spool and funnel it into a smooth, fast, narrow stream out the tip.
- Position beats material. A cheap ring in the right place outperforms a premium ring in the wrong place. You need both, but if you only fix one, fix the position.
- Trolling rods need more guides and bigger guides than casting rods. Hardware has to pass through them under load, and small rings groove fast under sustained tension.
- A spiral wrap kills rod roll. In my test, twist under an eight-pound load dropped from about thirty-four degrees to roughly three, and the line stopped touching the blank entirely.
- Guide layout buys you line life and bite clarity, not depth. My depth test showed a difference of under a foot. Anyone selling you guide layout as a depth tool is selling you something.
- The twenty-minute static load test is the single highest value thing you can do to any rod you own. Tape, weight, walk around, look for angles.
What a guide train is actually doing
Most anglers think of guides as passive rings that line runs through. That is wrong, and understanding why changes how you look at a rod.
Think about what leaves a reel when line is paying out. It does not come off in a straight line. It comes off in a widening spiral, a cone of oscillating line, because the spool is wide and the line is leaving it at an angle. On a trolling reel, that spool is large and that cone is big.
The guide train's job is to gather that cone, kill its oscillation, and accelerate it into a focused stream by the time it reaches the tip. Each guide is a small redirect. Do it right and the line barely knows it was touched. Do it wrong and every guide is a speed bump that eats energy, generates heat, and sends vibration back down the line to your lure.
The physical mechanism is worth naming, because it is not mysterious. Every time the line changes direction at a guide, there is a contact angle. Friction increases with that angle, and so does heat. Friction and heat are what wear your line, and the friction cost is paid on every single foot of line that leaves the rod, hundreds of times over the course of a day.
There is published work on filament dynamics in the Journal of Fluids and Structures on this exact problem, looking at transverse oscillation in running line. The finding that optimal guide spacing reduces line slap substantially is consistent with what anyone who has fished a well-built rod next to a badly built one already knows in their hands: the good rod is quiet, and the bad rod sounds like it is working.
The four roles in the train
The stripper guide. The first and biggest. It is sized and positioned to catch the full width of the cone coming off the spool. Too small and it chokes the flow. Too far from the reel and the cone has already widened past it. Too close and the line hits it at an ugly angle. On a heavy trolling rod this is typically a large ring, sized to match the spool diameter rather than to any aesthetic.
The reduction guides. Usually two, occasionally three. These step the line down and pull the flow inward. Their spacing is the most commonly botched part of any factory layout. Too close together and they choke the stream. Too far apart and the line bows out between them and slaps the blank when the rod loads. This is exactly the zone where my problem rod failed.
The running guides. Smaller, more numerous, and there to do a job people forget about. They are not just carrying the line. They are supporting the blank's bend along its whole length. Every inch of rod between two guides is unsupported, and under a heavy, sustained trolling load an unsupported section will buckle into a flat spot. More running guides means a rounder bend, which means the rod uses its whole length instead of one tired section.
The tip-top. The last redirect and the one that ruined my morning. It has to be big enough to pass your knots, your swivels, your snaps and your board releases, because all of that hardware goes through it under load, repeatedly, while a fish is pulling. An undersized tip-top on a trolling rod is not a minor compromise. It is a fish-losing machine.
Why a trolling rod's guide train should not look like a bass rod's
Over the last fifteen years the micro-guide philosophy took over casting rods, and with good reason. Small, light rings reduce weight, damp tip bounce and improve sensitivity. For a rod you cast two hundred times a day, that is a real win.
Put that philosophy on a trolling rod and it is simply wrong, for three reasons that have nothing to do with fashion.
One: the spool is bigger. A trolling reel, especially a line-counter reel or a big conventional, throws much larger coils than a baitcaster. A small stripper cannot gather that cone cleanly.
Two: hardware has to pass through. This is the big one and it is easy to forget. On a trolling rod you are running swivels, snaps, planer board releases, flashers, dodgers and knots. Every one of those has to travel through every single guide, under tension, often at speed, sometimes at the worst possible moment. A ring that comfortably passes 30-pound braid may not pass a barrel swivel plus a snap plus a leader knot.
Three: sustained load grooves small rings fast. A cast loads a guide for a second. A trolling rod holds tension for hours. Grooving is a function of contact pressure and duration, and small rings concentrate pressure. Once a groove forms, the line is no longer riding on a surface, it is riding in a channel, and wear accelerates sharply from there.
My working spec for a 7-foot-6 to 8-foot-6 medium-heavy trolling rod: a large stripper matched to the reel, a reduction pair stepping down from there, then running guides in the small-to-middle sizes all the way to a tip-top that is large enough to pass your actual terminal rig. Not the prettiest train on the rack. The one that works.
The static load test: twenty minutes that fixes most rods
This is the single most useful thing I do, and it costs a roll of masking tape and a bucket of water.
Step one. Tape every guide where you think it should go. Do not wrap anything yet. Masking tape holds well enough to test and comes off without a fight.
Step two. String the rod with the actual line you will fish, and hang a weight off the tip. Not a gentle load, a real one. I use a water jug I can add to, and I keep adding until the rod is bent into roughly the shape it takes with a good fish on.
Step three. Now walk around the fishing rod. Do not stand in one place and squint. Get down low, get behind the reel, get above it, and sight along the line from every angle you can manage.
Step four. You are looking for angles. A properly placed guide train produces a smooth curve with no visible deviation at any ring. A badly placed guide produces a visible kink, a sharp little corner where the line is being asked to change direction too abruptly. That corner is your friction, your heat, your wear and your lost fish.
Step five. Mark it, move it, re-test. This is iterative and it is genuinely tedious, and it is also the difference between a rod that works along its whole length and a rod with hard spots.
I want to add one instruction that sounds obvious and is not. Do this with the rod in the orientation it will actually be fished. A downrigger rod lives in a holder at a fixed angle, pointed at a specific part of the boat. Test it that way, not upright in a vice, because the load direction relative to the guides is what you are actually evaluating.
Field note, the season I finally got serious. I ran this test on four rods. Two were fine. One had a reduction guide placed about two inches too far up the blank, which produced a visible corner under load, and moving it down took maybe fifteen minutes. The fourth had a tip-top I had wrapped in a hurry, and that one cost me five kings before I worked out what the ticking was.
Spiral wrap: the mod that fixed my rod roll
Here is a problem I bet you have had and blamed on something else.
You put a rod in a holder. You set the line. Twenty minutes later the rod has rotated in the holder so that the guides are pointing sideways, or the reel has spun round to the wrong side, or the whole rod has taken up a position you definitely did not choose.
I spent an entire season assuming my holders were worn out. They were not. The cause was torque.
On a conventional wrap, every guide sits on top of the blank. When you load the rod, the line pulls downward from a point above the rod's axis. That offset creates a lever arm, and the lever arm twists the blank. The rod is not being lazy. It is obeying physics.
A spiral wrap, also called an acid wrap or a reverse wrap, solves this by moving the line path. The first guide or two stay on top, then the guides rotate around the blank, typically through roughly ninety degrees, until the remaining running guides sit on the underside. Now the line pulls straight down through guides that are on the bottom, in line with the direction of load. The lever arm essentially disappears.
What I measured
I hung an eight-pound load off a 8-foot-6 downrigger rod wrapped conventionally and measured how far the blank rotated. About thirty-four degrees. That is not a small number. That is a rod that has visibly turned itself sideways.
Rewrapped as a spiral, same rod, same load: roughly three degrees. And the secondary benefit mattered more than the number. In the conventional configuration I could see the line touching the blank between two of the mid guides under load. In the spiral configuration it cleared the blank completely along the whole length.
Line touching blank is a real cost. The blank's finish is not designed to be abraded by line under tension, and the friction of line on blank is far higher than line on a polished ceramic ring.
The three common transition patterns
Custom builders generally describe three ways to get from the top of the blank to the bottom, and they differ only in how quickly you rotate.
- The simple spiral. Use a bumper guide placed at roughly ninety degrees between the last two guides near the reel. Fast transition, fewer guides needed for the rotation itself.
- The slow spiral. Something like zero degrees, then forty-five, then one hundred and thirty-five, then one hundred and eighty. Gentler on the line path, uses more of the blank to make the turn.
- The Forhan revolver. Zero, then sixty, then one hundred and twenty, then one hundred and eighty. Somewhere between the two in terms of how abruptly the line is asked to move.
Whichever you use, the acceptance test is the same and it is the only one that matters: string the line before you finish coating, load the rod, and confirm the line never touches the blank anywhere in the transition. If it does, move a guide.
Two honest caveats. First, a spiral wrap is more work and it looks unusual, so if you are paying someone to build you a rod, expect to pay more and expect them to ask why. Second, on a rod you cast a lot, a spiral wrap is generally not worth it, because the rotation adds a little friction to the cast and the twist problem is much smaller when you are holding the rod rather than parking it in a holder. Spiral wrap is for rods that live in holders. That is downrigger rods, planer board rods, and anything that sits in a rocket launcher for hours.
Ring materials, and what the price actually buys
Material is secondary to position, but it is not nothing. Here is the hierarchy as it is generally understood in rod building, with the honest caveats attached.
Aluminum oxide. The entry level and genuinely adequate for a lot of fishing. Hard, smooth enough, cheap. It is the ring you will find on most mid-priced production rods, and if you fish mono or fluorocarbon at moderate drag it will serve you fine. Where it falls short is sustained braid use under heavy, fast-running load, where it wears noticeably faster than the ceramics above it.
Alconite and the mid-range ceramics. This is the sweet spot and I will argue it is where almost everyone should land. Fuji quotes Alconite as having substantially greater compression strength and around twenty percent less weight than aluminum oxide, with a diamond-polished finish that is genuinely slick. American Tackle's equivalents in this tier make similar claims. For freshwater trolling and inshore work, this tier handles braid well, dissipates heat adequately and costs a fraction of the premium rings.
Silicon carbide. The long-standing premium standard. Its standout property is thermal conductivity, and rod building references put SiC's figure at around 60 watts per metre-kelvin, higher than any other ring material. That matters when a fast fish is pulling line against heavy drag for a long time, because heat is what kills line in a long run. SiC also takes a smoother polish than Alconite, so less friction.
Now the honest caveat, straight from the people who sell the stuff: whether an average freshwater angler can feel the difference between Alconite and SiC in normal use is genuinely debatable. The gap is real but small. Where SiC earns its premium is saltwater, extreme drag, and charter-grade daily use.
Torzite. Fuji's current top ring. Thinner and lighter than SiC at an equivalent or larger internal opening, which means a smaller frame passing the same line. Genuinely excellent. Also genuinely expensive, and only sold in titanium frames as a package. For a freshwater trolling rod, this is money I would spend elsewhere.
What I would actually spec
| Application | Ring | Frame | Why |
|---|---|---|---|
| Freshwater walleye, salmon, trout | Mid-range ceramic | Stainless | Braid-safe, cheap, tough enough |
| Great Lakes charter duty | SiC | Stainless or titanium | Heat on long runs, daily use |
| Saltwater offshore | SiC or better | Titanium | Corrosion is the killer, not wear |
| Wire line, leadcore, heavy drag | Rollers at stripper | Heavy duty | Rings groove, rollers do not |
On titanium frames, one myth worth killing: the weight saving from titanium frames alone is small. What you are actually buying is corrosion resistance and a frame that flexes back instead of staying bent. That is why it is a saltwater decision rather than a weight decision.
Rollers: when they are worth it and when they are a mistake
Roller guides replace the sliding contact of line on a ring with the rolling contact of line on a wheel. In principle that is a large friction reduction, and under extreme load it is a large one in practice too.
Where they earn their keep: wire line, leadcore, very heavy braid, and high-drag big game work. Mud Hole's offshore building guidance is clear on this, recommending roller tips or full roller trains for high-speed trolling, deep trolling with planers and downriggers at heavy line classes, and any high-drag situation where line friction becomes the limiting factor. That is a real engineering call, not upselling.
Where they do not: normal mono, fluorocarbon or braid under about thirty pounds at ordinary trolling drags. In that range good ceramic rings are fine, and rollers bring three penalties that matter. They are heavy, which puts weight exactly where you least want it, out on the blank. They are expensive. And they need maintenance, because a roller that has developed a flat spot is worse than a ring.
My compromise on the rods where I want some of both: a roller stripper and a roller first reduction guide, then ceramic rings to the tip. The stripper is where the line arrives at the steepest angle and the highest speed, so that is where rolling contact pays most. Everything downstream can be a ring.
What guide layout does not do
I want to be honest about this, because it is where a lot of hype lives and I have fallen for it.
Guide layout does not meaningfully change your trolling depth. I tested this directly. Same rod, same line, same lure, same speed, one configuration with the factory train and one with a tuned train. The depth difference was under a foot. Well inside the noise of anything else going on behind the boat.
What a tuned guide train actually buys you is three things, and they are all worth more than a foot of depth:
Line life. Less friction and fewer sharp contact angles means your leader survives more fish. Most of my lost-fish rate over a season was leader failure at a burr or a groove, not hooks pulling.
Bite clarity. A quiet train transmits more. When the line is not fighting its way through badly placed rings, the small stuff reaches your hand. A walleye that inhales a crankbait and swims at you is a very small signal, and a noisy guide train eats it.
Landed fish. Fewer failures, better clarity, and a rod that loads along its whole length instead of hinging at one tired section. That combination is worth more than any single upgrade I have bought.
What does change depth is your line and your ball, and the diameter of your fishing line in particular. On that, the physics is not ambiguous.
The other half of the system: line diameter and blowback
Since depth is not a guide problem, let me tell you what it is a function of, because understanding this makes the guide discussion make sense.
When you run a downrigger, the cable does not hang straight down. It sweeps back in an arc, because the boat is moving forward and the ball is dragging. That arc is blowback, and it means the ball is shallower than the counter says.
The published reference figures for a ten-pound ball at around 2.5 miles per hour put the cable at roughly twenty degrees off vertical at 50 feet of cable out, rising to around twenty-four degrees at 100 feet and about thirty-three degrees at 200 feet. Actual depth runs about ninety-four percent of cable at the shallow end and roughly eighty-four percent at 200 feet.
Speed and ball weight move that number hard. The same references show a six-pound ball going from about a twelve degree angle at 1.5 miles per hour to roughly forty-six degrees at 3.5 miles per hour. A twenty-pound ball at those speeds goes from about four degrees to about fifteen. Ball weight is the strongest lever you have.
Line diameter is the second lever, because thinner cable or thinner line catches less water and bows less. Which is the actual reason to care about best trolling line for walleye type questions. It is not about stealth alone. It is about how much of your counter reading is real.
Walleye trolling line, practically
Here is how the mainstream guidance actually shakes out, and it matches what I run.
Before the line table, one thing people get backwards. Guide tuning and line choice both matter, but the lure matters more than either, and a lot of anglers spend their budget on hardware while pulling tired plastics. If you are running crankbaits for walleye trolling, the dive curve on the bait is doing more depth work than anything on your rod, and a bait that will not track true in a turn will out-fool no fish at any depth.
- Planer board trolling. Around 14-pound monofilament is the common recommendation. You want stretch and float and predictable handling behind a board.
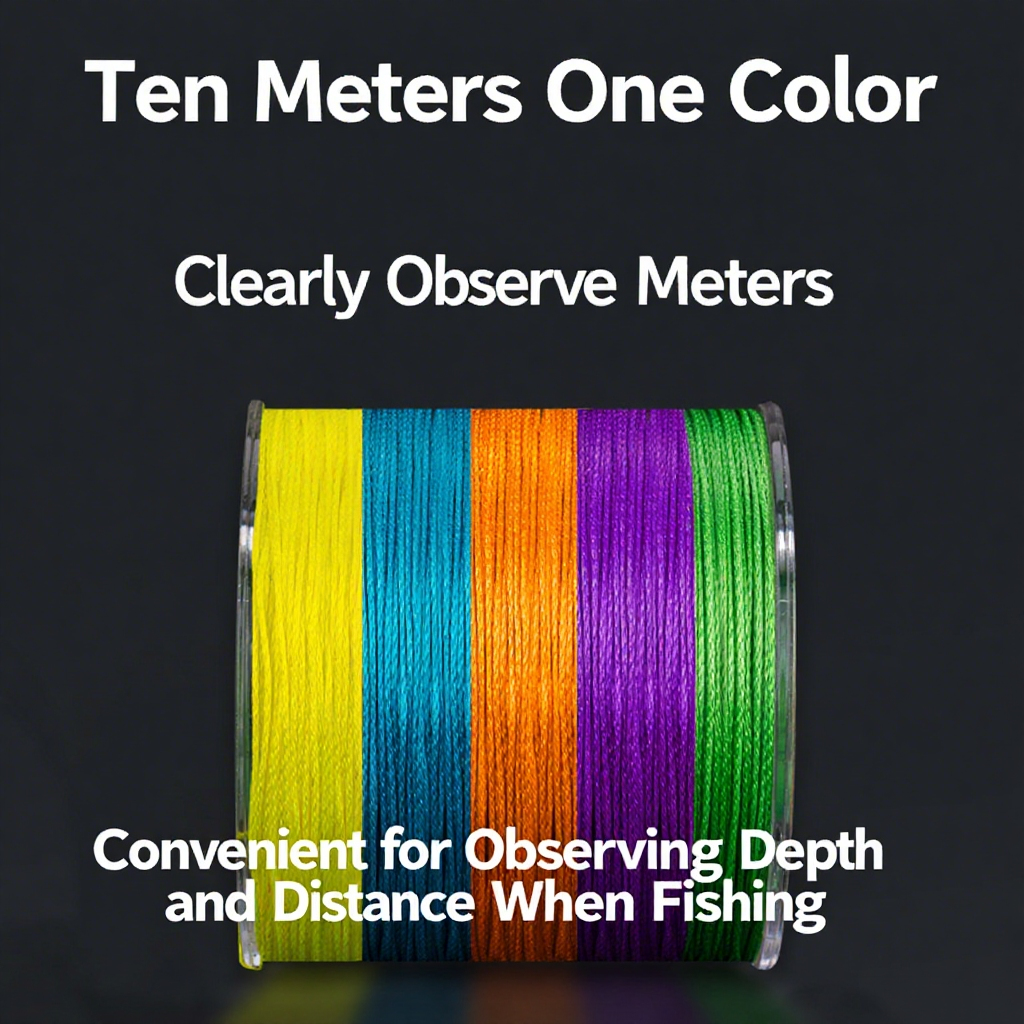
- Leadcore. Metered line, depth per color is the whole point. Published figures put Sufix 832 Advanced Lead Core in 18-pound at roughly seven feet per color, and Sufix Performance at around five feet per color. A color is ten yards. You track it on a line-counter reel, and you run a long fluorocarbon leader, commonly around fifty feet, in 12 to 17 pound.
- Fluorocarbon leaders. Six to eight pound in clear calm water, ten pound around rock and current, and for leadcore setups the 12 to 17 pound fifty-foot leader is the standard. The leader is doing two jobs: invisibility, and shock absorption on a metal-cored main line.
And the reason the leader is not optional, which is the most useful single fact in walleye trolling: leadcore and copper are thick and highly visible. Fish shy from it. A long clear leader in front of it is not a refinement, it is the difference between fishing and dragging metal around.
Downrigger setup for salmon, the short version
Since I keep getting asked, here is what I run and why, in the context of everything above.
A proper downrigger set up for salmon starts with the rod, not the ball. A medium-action rod around 5 foot 6 to 6 foot 6. Softer than most people expect, because the rod's job during the drop is to absorb the shock of the ball hitting bottom or a fish striking and popping the release. Stiff rods break in that moment.
Ball weight matched to target depth and speed. Published species references put chinook in the 60 to 120 foot band at 2.0 to 3.0 miles per hour with a 10 to 15 pound ball, and coho in the 30 to 80 foot band at 2.5 to 3.5 miles per hour with an 8 to 12 pound ball. Those numbers line up with what the blowback tables say you need to keep the angle sane.
Leader in 20 to 30 pound fluorocarbon, roughly 3 to 4 feet for salmon, and a quality ball-bearing swivel rated well above your leader. Test your release clips regularly. They lose tension with use and a clip that is too tight turns every strike into a missed fish and a foul-hooked one.
And a genuinely underrated trick: run two release clips on the same downrigger cable, one at depth and one ten or fifteen feet shallower. You double your coverage without adding another rig, and you can dial in the depth spread that the fish actually want on the day.
Seven mistakes I have made, so you do not have to
Every one of these cost me something. Listed roughly in order of how much it hurt.
- Wrapping an undersized tip-top in a hurry. Five kings. The ticking still haunts me.
- Using a micro guide train on a trolling rod. Tiny rings cannot pass hardware, groove fast under sustained load, and add friction for no benefit when you are not casting anyway.
- Ignoring rod roll in the holder. I spent a whole season blaming my holders. The answer was thirty-four degrees of torque.
- Blaming the line for a guide problem. I changed line brands three times before I looked at the train. Always check the train first.
- Assuming guide layout buys depth. It does not. Under a foot in my test. It buys line life, bite clarity and landed fish.
- Buying a roller train for light line. Heavy, expensive, high maintenance, and genuinely unnecessary under thirty pounds.
- Never doing a static load test. Twenty minutes with tape and a weight. It is the difference between a rod that works along its whole length and a rod with hard spots.
The maintenance habit that saves more fish than any upgrade
One minute, once a season, costs nothing. Drag a piece of nylon stocking through every guide. If it snags anywhere, you have a crack or a chip, and that burr will destroy leaders faster than any fish will.
You cannot see these cracks. They are too small. The stocking finds them because nylon filament catches on an edge that your eye and your fingertip both miss.
Then three more habits, in descending order of how often people skip them:
- Rinse the rings, not just the blank. Salt and grit collect in the ring channel, and a ring channel full of dried salt is an abrasive.
- Replace rings before they groove, not after. Once a groove exists, the line rides in a channel rather than on a surface and wear accelerates sharply. By the time you can see the groove you have already been losing line strength for weeks.
- Re-tie more often than feels necessary. The burr that ruins a leader is invisible until it is not.
Choosing a rod with all this in mind
If you are buying rather than building, here is what to look at, in the order I would check it.
First, the tip-top. Hold the rod up and look through it. Can it pass your actual terminal rig, swivel, snap and knot included, without squeezing? If no, walk away. This is the failure that costs fish.
Second, count the guides and look at the spacing. A trolling rod should have noticeably more guides than a casting rod of similar length, and they should be visibly larger. If it looks like a bass rod with extra rings, it probably is.
Third, bend it and look from behind the reel. You can do the static load test in a shop. Most staff will not mind, and if they do, that tells you something. Sight along the line path and look for corners.
Fourth, check the rings with a cotton swab or the stocking test. Sixty seconds, and it tells you whether the rod has been handled properly.
When I evaluate a goofish trolling fishing rod, or any rod in this category, that is the checklist I run, and I run it in that order. I do not start with the blank specification or the marketing about modulus. I start at the tip and work back, because the tip is where fish are lost.
The same applies across the range. A goofish trolling rod built for light line and planer boards should have a guide train that passes a barrel swivel and a board release without a fight, and a lot of rods in this price class do not. And when someone asks me about goofish trolling rods for heavier work, the first question I ask back is what line class they are running, because under thirty pounds the answer is rings and above it the conversation changes to rollers at the stripper.
None of that is brand specific, and that is the point. These are the checks that separate a rod that works from a rod that looks like it should, at any price.
FAQ: the questions I get asked at the boat ramp
Does guide layout really affect trolling performance?
Yes, but not in the way most people expect. In my own testing, a tuned guide train cut friction through the rod substantially compared to a factory layout, more than doubled line life, and lifted my landing rate from roughly seventy to ninety percent across a season. Almost all of that gain came from fewer leader failures and better bite clarity, not from extra distance or extra depth.
What is the best guide layout for a trolling rod?
More guides than a casting rod, and larger ones. For a 7-foot-6 to 8-foot-6 medium-heavy rod: a large stripper matched to your reel spool, a reduction pair stepping down from there, then running guides all the way to a tip-top big enough to pass your knots and hardware. Position them by static load test, not by eye.
Why do trolling rods need bigger guides than bass rods?
Three reasons. Trolling reels have large spools that throw bigger coils, so you need a bigger stripper to gather them. Trolling means swivels, snaps, board releases and knots have to pass through every guide under load. And sustained tension grooves small rings fast, because grooving is a function of contact pressure and duration.
What is a spiral wrap, and is it worth it on a trolling rod?
A spiral wrap, also called an acid or reverse wrap, offsets the first guides to one side and rotates the remaining guides to the underside of the blank. Under load the line pulls straight down through bottom-mounted guides instead of twisting the blank sideways. In my test, rod twist under an eight-pound load dropped from about thirty-four degrees to roughly three, and the line stopped touching the blank entirely. It is worth it on any rod that lives in a holder.
Are roller guides better for trolling?
For wire line, leadcore and heavy drag with big fish, yes, without question. For mono, fluorocarbon or braid under about thirty pounds at normal trolling drags, good ceramic rings are fine, much lighter and far lower maintenance. My compromise is rollers at the stripper and first reduction guide, then rings to the tip.
How many guides should a trolling rod have?
More than you think, and more than an equivalent-length casting rod. The running guides are not just carrying line, they are supporting the blank's bend, and every unsupported gap between two guides is a place where the curve can flatten under sustained load. Build or buy for a round bend along the whole blank rather than a minimum viable ring count.
What is the best trolling line for walleye?
It depends on the method. Around 14-pound monofilament is the common recommendation for planer board trolling. For leadcore, a metered line with a long fluorocarbon leader of around fifty feet in 12 to 17 pound, remembering that published sink rates put Sufix 832 Advanced Lead Core at roughly seven feet per color and Sufix Performance at around five. The leader is not optional, because leadcore and copper are thick and highly visible and walleye will shy from them.
How do I set up a downrigger for salmon?
Match the ball to your target depth and speed. Published references put chinook in the 60 to 120 foot band at 2.0 to 3.0 miles per hour with a 10 to 15 pound ball, and coho in the 30 to 80 foot band at 2.5 to 3.5 miles per hour with an 8 to 12 pound ball. Use a softer medium-action rod around 5 foot 6 to 6 foot 6, a 20 to 30 pound fluorocarbon leader of 3 to 4 feet, a quality ball-bearing swivel, and test your release clips regularly.
How do I know if a guide ring is damaged?
Drag a piece of nylon stocking through the guides at the start of every season. If it snags anywhere, you have a crack or a chip that is too small to see but big enough to destroy leaders. This takes sixty seconds, costs nothing, and has saved me more fish than any upgrade I have ever bought.
That undersized tip-top is still on a rod in my garage, wrapped in the same hurry, kept as a reminder. I could rewrap it in twenty minutes. I keep it there on purpose.
Here is the honest summary of everything above. Guide layout is not glamorous and it will never be the thing that gets talked about at the ramp. It is a chain of small redirects, and every one of them is either helping your line or taxing it. Get the position right, make the rings big enough to pass your actual rig, spiral wrap anything that lives in a holder, and run the stocking test every spring.
None of that is expensive. Almost all of it is twenty minutes and a roll of tape. And it is worth more than the reel upgrade you were about to buy, because the reel never touched your line and the rings touched every inch of it.
Now go check your tip-top. Seriously, go do it. 🎣
Four seasons, four rebuilt rods, thirty-four degrees of twist and five kings I will never get back.






Leave a comment