


Fish Finder Jigging Reel: Sync with Locator for Cast 🎣📡
How to turn the picture on your screen into a jig landing on a fish's nose, on the first drop, while the boat keeps sliding sideways.
There is a particular kind of frustration that only electronics can create. You are staring at a screen that is absolutely covered in fish. Beautiful arches. Thick ones. Stacked up in a column like a parking garage. And you drop your jig, and you drop it again, and you drop it a third time, and you catch nothing, while the guy on the other side of the boat, using the same screen and the same depth, is bent over on his second drop.
The difference between you and him is not luck and it is not a secret lure. It is that he understands what the screen is actually showing him, and you are treating it like a map when it is really more like a very rough sketch taken through a keyhole.
I spent an embarrassing number of seasons being you. This article is everything I eventually worked out, and it comes down to one idea: your fish finder and your jigging reel are two halves of one instrument, and if they are not synced, you are fishing blind with extra steps. 🛠️
The Morning I Realised I Had Been Fishing the Wrong Water 🐟
Let me give you the day it broke open for me, because I think this specific failure is one almost every jig angler goes through.
I was on a small centre console out of a harbour on the east coast, maybe nine miles offshore, working a rubble bottom in about a hundred and ten feet. The sounder was showing exactly what you hope for: a bait cloud hugging the bottom at around ninety-five feet and several heavy arcs sitting just under it, in the hundred to a hundred and five foot band. Textbook. I was fishing a slow pitch jig, roughly a hundred and fifty grams, on a small overhead reel.
I dropped. Nothing. I dropped again, slightly up-drift. Nothing. Third drop, I let it sit on the bottom for a while and worked it slowly. Nothing. Meanwhile the skipper, who had said almost nothing all morning, was quietly landing a snapper every second or third drop.
Around the fourth blank drop I finally asked him what he was doing differently. He shrugged and said something I have never forgotten: "I am not fishing where the fish are. I am fishing where the fish are going to be by the time my jig gets down."
That single sentence contains three separate pieces of physics, and I want to walk you through all of them, because once you see them you cannot stop seeing them.
What he understood that I did not: the boat was drifting at around half a knot. My jig took roughly thirty seconds to reach the bottom. In thirty seconds at half a knot, the boat travels about twenty-five feet. So every single time I dropped directly on a beautiful mark, by the time my jig arrived, that mark was twenty-five feet behind me, and my jig was falling through water the fish had left.
I was not fishing badly. I was fishing in the past tense. ⏱️
What the Screen Is Actually Telling You 📐
The first thing to internalise is that a fish finder does not show you a precise point. It shows you a cone, and inside that cone, somewhere, there is a fish. Understanding the cone is the whole foundation.
The cone, and why it lies to you about position
Your transducer emits a sound pulse in a cone shape that widens with depth. Anything inside that cone returns an echo, and the unit draws it on screen at the depth it measured. Crucially, the unit has no idea where inside the cone the fish was. A fish at the edge of the cone and a fish dead centre both get drawn in the same place.
The cone width depends on the beam angle, and beam angle depends mainly on frequency. As a general rule in recreational sonar, lower frequencies give wider cones and higher frequencies give narrower, more detailed cones. Transducer manufacturers publish actual beam angles for their models, and the figures from makers such as Airmar are worth looking up for your specific unit, because the numbers vary a lot by model. A commonly quoted pairing is roughly twenty degrees at eighty-three kilohertz and roughly ten degrees at two hundred kilohertz, which is a useful working assumption if you cannot find your own spec.
The geometry is simple trigonometry:
Cone diameter = 2 × depth × tan(half of the beam angle)
Here is what that works out to in real numbers, and this table changed how I fish more than anything else in this article.
| Depth | 20 degree beam cone width | 10 degree beam cone width | What it means for you |
|---|---|---|---|
| 30 ft | 10.6 ft | 5.2 ft | Tight. A mark is nearly under you. |
| 60 ft | 21.2 ft | 10.5 ft | Still manageable, but the edge is moving. |
| 100 ft | 35.3 ft | 17.5 ft | A mark could be up to 17 ft to your side. |
| 150 ft | 52.9 ft | 26.2 ft | Now you really are guessing where. |
| 200 ft | 70.5 ft | 35.0 ft | A third of a tennis court wide. |
Look at the hundred foot row, because that is where most people jig. With a ten degree beam, a fish drawn at a hundred feet could be anywhere inside a circle seventeen feet across. That is not a small error. That is the difference between your jig landing on its head and landing a full boat length away.
The cone: what your screen collapses into one pixel 🧭
What this means practically
- In shallow water, trust the mark and drop right on it. At thirty feet the cone is about five feet wide with a high frequency beam. Drop immediately.
- In deep water, treat the mark as a probability circle. Your first drop is a sample. If nothing, you are probably at the edge of the cone, not in a barren spot.
- Use your narrowest practical beam for jigging. Detail beats coverage when you are trying to place a jig precisely. Wide coverage is for finding; narrow is for catching.
Reading the Marks: Arches, Blobs, and Bait 🎯
Before you can sync anything, you have to know what you are looking at. Three shapes matter for jigging.
Arches
The classic fish arch. A fish swimming through the cone enters at the edge, moves toward the centre, then back out to the edge, so its distance from the transducer changes during the pass, and the unit draws that changing distance as a curve.
Key insight that most people miss: an arch means the fish is moving relative to your boat. A fish sitting perfectly still at a fixed distance, or a fish holding station while you drift past at matched speed, draws as a straight line or a thick blob, not an arch. So a beautiful arch can be a fish that is actively feeding and moving, and a flat thick line can be a fish that is parked. Both catch. Do not worship arches.
Bait clouds
A diffuse, granular, often fuzzy mass, usually above the bottom or layered at a thermocline. This is the single most important thing on the screen for a jigger, because predatory fish are almost always positioned relative to the bait rather than relative to the bottom.
My rule: fish the bottom edge of the bait, not the middle. Predators sit below and to the side, looking up. If your jig is in the middle of the bait cloud, you are in the food, not above the eater.
Hard bottom returns
A strong, bright, thick bottom line usually means hard bottom: rock, rubble, reef, shell. A thin, weak line means soft bottom: mud, sand, silt. Structure fish hold to hard bottom, so the character of your bottom return tells you whether the mark is worth dropping on at all.
The Drift Problem: You Are Fishing in the Past Tense ⏱️
This is the part that fixed my fishing, and it is simple arithmetic that almost nobody does on the water.
The lead calculation
When your jig leaves the rod tip, two clocks start running:
- The jig is falling at some speed toward the bottom.
- The boat is moving sideways at the drift speed.
By the time the jig reaches target depth, the boat has moved. So the point directly below your rod tip at the moment of arrival is not the point you saw the fish. To hit the fish, you must release the jig up-drift of the mark by the distance the boat will travel during the fall.
The formula:
Lead distance (feet) = drift speed (feet per second) × fall time (seconds)
Convert drift from knots to feet per second by multiplying knots by 1.688. So half a knot is about 0.84 feet per second, and one knot is about 1.69 feet per second.
Concrete example, using my own numbers
- Depth to target: 100 feet
- Measured fall rate of my 150 gram jig on 30 pound braid: about 3.1 feet per second
- Fall time: 100 ÷ 3.1 = roughly 32 seconds
- Drift: 0.5 knots, which is 0.84 feet per second
- Lead: 0.84 × 32 = about 27 feet
So I need to drop the jig roughly twenty-seven feet before the boat reaches the mark. On a screen with a scrolling history, that means I release when the mark is still some distance behind the boat, and I let the boat carry me to it while the jig falls.
Leading the drift 🧭
How to get drift speed when you have no electronics
If your unit does not show speed over ground, you can estimate it well enough:
- Throw a small float or an empty bottle overboard on a short piece of line and count how long it takes to pull taut, or watch it against a fixed object.
- Watch your line angle. A jig hanging straight down means no drift. Line angled out behind the boat means you are moving, and the steeper the angle, the faster the drift.
- Use a free GPS speed app on a phone. Crude, but plenty accurate for a lead calculation.
When the drift is fast, change the plan, not the cast
Above about one and a half knots of drift, the lead calculation starts producing silly numbers, because your fall time gets long and your lead gets huge, and the jig ends up dragging at a steep angle with no feel. At that point, stop drift-jigging. Either deploy a sea anchor or drift sock to slow the boat, use a trolling motor with an anchor function to hold you over the spot, or switch to casting ahead and working the jig back, which is a completely different and much better technique in a fast drift.
Knowing Your Fall Rate: The Missing Number 📏
You cannot do the lead calculation without knowing how fast your jig falls. Almost nobody knows this number, and almost everybody should.
How to measure it
This takes fifteen minutes in a swimming pool, a deep marina berth, or off a dock, and a phone stopwatch.
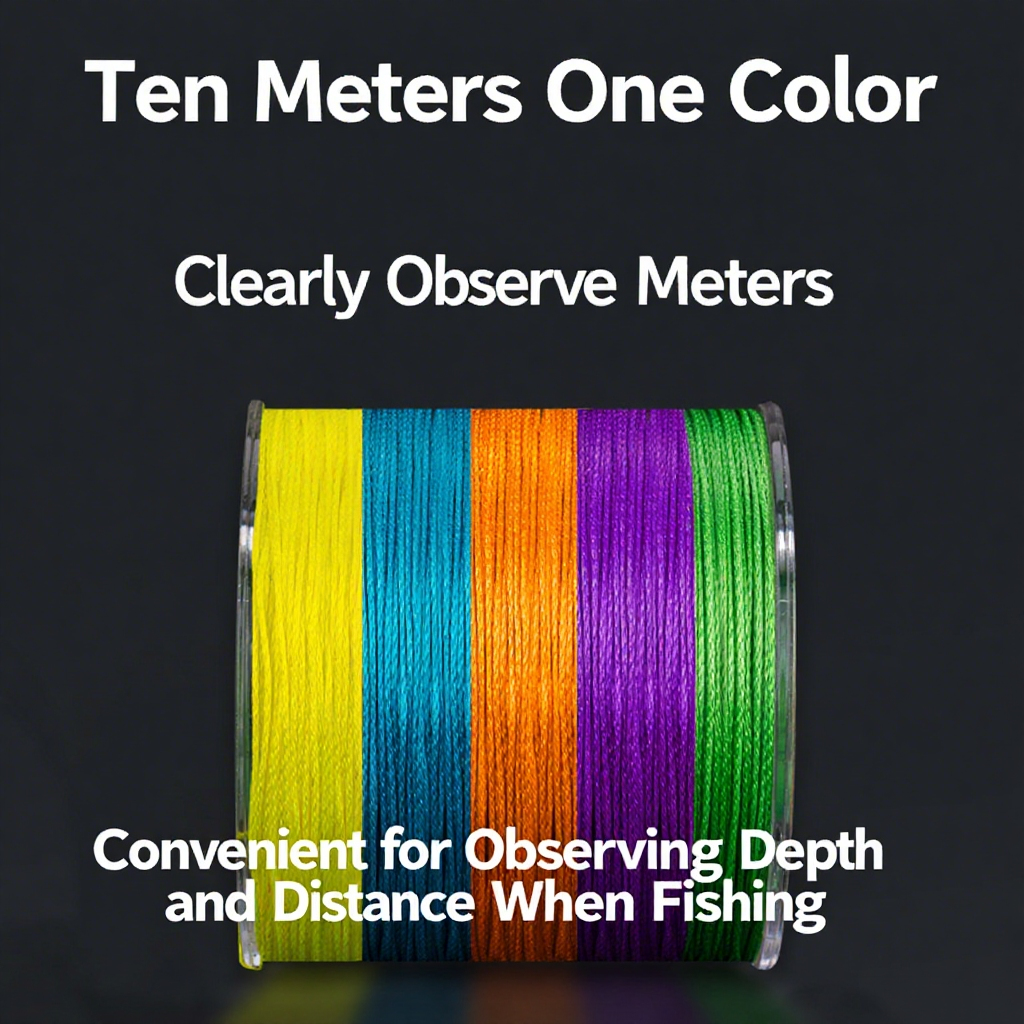
- Use coloured braid with metre or ten-metre markings, or mark your line with a permanent marker at known intervals.
- Free-spool the jig from the surface and time it to a known depth.
- Divide depth by time. That is your fall rate for that jig, on that line, in those conditions.
- Repeat with your two or three most-used jigs and write the numbers on a bit of tape stuck inside your tackle box lid.
My own measured numbers
These are my measurements, taken in calm water off a dock in about forty feet, with a light overhead reel, free spool, no current, jig falling on a slack line. Your numbers will differ, and that is exactly the point: measure your own.
| Jig | Weight | Line | Measured fall rate | Time to 100 ft |
|---|---|---|---|---|
| Long slim slow-fall profile | 120 g | PE 2 braid | 1.6 ft per second | 63 s |
| Standard centre-balanced | 150 g | PE 2.5 braid | 3.1 ft per second | 32 s |
| Compact heavy | 200 g | PE 3 braid | 4.4 ft per second | 23 s |
| Standard 150 g, with current pushing line | 150 g | PE 2.5 braid | 2.2 ft per second | 45 s |
Two things jump out of that table. First, the spread between a slow-fall profile and a compact jig is enormous: sixty-three seconds against twenty-three seconds to reach the same depth. That is a difference of forty seconds, and at half a knot of drift it is a difference of about thirty-four feet of lead. Same fish, same screen, completely different cast.
Second, current changes everything. My 150 gram jig lost nearly thirty percent of its fall rate when there was a lateral current pushing the line sideways. This is the single most common reason a lead calculation that worked beautifully last week fails this week.
Coloured braid is the cheat code
Multi-coloured braid with a colour change every ten metres removes the guesswork entirely. You count colours instead of seconds, and current stops mattering, because you are measuring actual jig position rather than elapsed time. It costs a little more and it is, in my opinion, the best value upgrade in this entire article. 🧵
Syncing the Reel: What to Actually Do With Your Hands 🎣
Right, so you know the cone, you know the drift, and you know your fall rate. Now the physical part. Here are the three deliveries that cover almost every situation.
Delivery one: the lead drop (vertical, drifting)
- Watch the screen and pick the mark you want before you are over it.
- Calculate the lead or, more realistically, estimate it from feel you have built up on this water.
- Release the jig with the reel in free spool and your thumb lightly on the spool, not pressing, just ready.
- Count, or watch the colours go.
- At the target depth, stop the spool. Not abruptly. Ease it.
- Feel for the bite on the drop. A huge percentage of jigging strikes happen on the fall, and most anglers miss them because they are watching the screen instead of the line.
That last point deserves its own paragraph. The bite usually happens on the drop, and it usually feels like nothing. The line just stops, or it goes slack, or it ticks. If you are staring at the sounder when it happens, you will never know. Look at your line at the water, or keep a finger on it.
Delivery two: the cast-ahead (fast drift or scattered marks)
When the drift is too fast to lead, or the fish are scattered across a wide area, stop dropping vertically and start casting.
- Cast up-drift and up-current of the marks, let the jig sink to depth, then work it back as the boat passes over the fish.
- In shallow to medium water this is where a bc reel for jigging starts making a lot of sense, because you are making repeated accurate casts rather than free-spool drops.
- Keep the rod tip up and stay in contact. The jig should arrive at the fish's depth just as the boat brings you level with it.
Delivery three: the hold and work (spot lock or anchor)
If you have a trolling motor with a position-holding function, or you are anchored, the drift problem disappears entirely and the calculation changes completely.
- Drop directly on the mark, no lead needed.
- Work the jig in place, and vary the depth band rather than the horizontal position.
- This is where slow pitch technique shines, because you can stay in the strike zone and work the same fish for a long time.
This is also, honestly, the easiest way to learn. If you are new to syncing electronics and reel, learn on a spot lock or an anchor first, where there is no drift to compensate for, and then graduate to drift jigging once the fall rate and the count are automatic.
Choosing the Right Reel for the Job ⚙️
Now we get to hardware, and there is a genuine fork here that people muddy constantly. Two different tools, two different jobs.
Vertical work: the overhead or conventional jigging reel
When you are dropping straight down in deep water, the priorities are free-spool smoothness, drag consistency, line capacity, and a comfortable handle for long grinds.
Free spool quality matters far more than most anglers realise, because your fall rate depends on it. A reel with sticky bearings or a rough spool tension knob will not let the jig fall at its natural rate, which quietly invalidates every number in your countdown. If you have ever wondered why your jig seems to fall slower than your mate's identical jig, this is usually why.
When people ask me about goofish slow jigging reels, this is the context they mean: small overhead reels purpose-built for working a jig vertically. The things I look for, in order, are free spool smoothness under a light jig, a drag that starts cleanly at low settings, and a handle long enough for the depth I am fishing. A jerky drag at the low end will cost you fish on light leader far more often than a max drag number will ever save you.
Any goofish slow jigging reel review worth reading will talk about free spool, and if it only talks about max drag and bearing count, it was written by someone who has not actually jigged with it.
When I am helping someone pick from the best goofish slow jigging reels for regular use, I ask three questions: how deep do you normally fish, how heavy is your standard jig, and do you fight fish from the shoulder or from a belt. The answers point at a size class faster than any spec sheet comparison. 🧭
Casting work: the baitcaster
Now the other half of the picture, and this is where a lot of jig anglers get stubborn for no good reason.
If your water is shallow to medium and your fish are spread out rather than stacked, you are casting, not dropping. And when you are casting a jig repeatedly and accurately, a low-profile baitcaster is simply the better tool. You get faster, more accurate casts, better control of the fall with your thumb, and much better feel.
This is the real home of bc reel jigging. A baitcasting reel lets you feather the spool during the fall with your thumb, which means you can slow or stop the fall instantly when a mark appears on the screen at a different depth than you expected. That is a genuine tactical advantage that a free-spool overhead reel cannot match.
Shopping for the best baitcaster for jig fishing means looking for three specific things, and none of them are the ones on the box:
- A spool light enough to start and stop cleanly with a light jig. Heavy spools are great for distance with heavy lures and terrible for controlled falls with a light jig.
- A brake system you can actually tune. Both centrifugal and magnetic systems work. What matters is whether you can dial it for the specific jig weight you are using rather than running one setting all day.
- A thumb bar and a spool you can reach. You are going to be thumbing constantly. If the spool is awkward to reach, you will stop thumbing, and then you will backlash.
Gearing: why ratio changes your cadence
Ratio matters more than most people think for jigging, because it sets your work cadence. A slow ratio, say four to one, gives you high torque and a slow, deliberate lift that suits slow pitch. A faster ratio, six or seven to one, lets you pick up slack fast during a fast fall and suits speed jigging.
You can sanity check the manufacturer's retrieve figure with basic arithmetic. Inches per turn equals pi times spool diameter times gear ratio. If the published number and your calculation disagree wildly, one of you has made a mistake, and it is worth knowing which before you buy.
Line: The Interface Between Screen and Fish 🧵
Your line is what translates the screen into a jig position, and it deserves more attention than brand loyalty.
Braid diameter drives fall rate
Thinner braid cuts water better, so your jig falls faster and straighter. Thicker braid drags, slows the fall, and bows in current, which is the thing that makes your countdown drift out of accuracy.
The trade-off is abrasion resistance and the fact that very thin braid is unpleasant to handle and unforgiving on your fingers. My compromise is to run the thinnest braid I can get away with for the depth and the bottom type, and then a fluorocarbon leader of two to three rod lengths for abrasion.
PE ratings, honestly explained
PE is a Japanese braid rating. The rough shorthand that most anglers use is PE number times ten gives you an approximate pound class, so PE 2 sits near twenty pound and PE 3 near thirty pound. That approximation is genuinely rough and brands vary, so always check the stated diameter in millimetres rather than trusting the number on the spool.
Leader length and why it matters for the drop
A long leader means the knot passes through the guides on every drop, which is fine, but a very long leader also means your coloured braid countdown becomes less accurate, because you have a long section of unmarked line at the bottom of your drop. Keep the leader short enough that your countdown stays meaningful, or accept that the last section is estimated.
Check the first three feet every time
Braid that has been rubbed against structure or dragged across a gunwale is braid that will break on the next good fish. Run the first few feet through your fingers before every trip. It takes four seconds and it has saved me more fish than any other habit.
Electronics Settings That Matter for Jigging 🎛️
You can own a fantastic unit and still get a useless picture because of three settings. Here is what I change on almost every boat I get on.
Sensitivity
Too low and you miss bait and small fish. Too high and the screen fills with noise and clutter that you will waste time casting at. The old rule of thumb is to raise sensitivity until you see speckle noise, then back off slightly. In practice, for jigging I want enough sensitivity to show bait clearly but not so much that the water column looks like static.
Also: turn off automatic sensitivity if your unit has it, at least while you are learning. Automatic sounds helpful and it constantly changes the picture, which makes it impossible to compare one spot with another.
Scroll speed
Slower scroll speed spreads the picture out horizontally, which makes it much easier to see separate fish and to judge the shape of a return. Faster scroll compresses everything into narrow spikes. For jigging I run slower than the default almost always, because I am trying to read individual fish rather than cover ground.
Ping rate
Faster ping rate means a more responsive picture when you are moving and a better picture at speed. The trade-off is that faster pinging can introduce noise. For slow drifting and vertical jigging you do not need a very fast ping rate, so you can trade it away for a cleaner picture.
Frequency choice
High frequency gives a narrow, detailed cone and shows bait and small fish beautifully, but it loses depth in deep water and it suffers more from boat motion. Low frequency gives a wide cone that covers water fast and holds depth, but it blurs detail.
For jigging, I want detail, because I am placing a jig precisely. So high frequency in shallow to medium water, and dropping to lower frequency only when depth forces it.
GPS, Waypoints, and the Part Everyone Skips 🛰️
This is unglamorous and it is worth more than most tackle purchases.
Mark what you catch on, not what you see
The temptation is to drop a waypoint on every mark. Don't. Drop a waypoint when you catch, or when you get a solid bite, and name it with the depth and the tide state if you can be bothered. Over a season you build a personal map of spots that produce, rather than a cloud of marks that might be anything.
Learn the drift line, not the spot
On a drift, the fish are rarely at a point. They are along a line or on a piece of structure that the drift crosses. So mark the start and the end of the productive drift, then run the same drift line again. Anglers who mark a single waypoint and then try to sit on it almost always fail, because the fish were on the structure, not on the coordinates.
Use the track, not just the marks
Your GPS track from a good day is the most valuable data you own. Save it. Next trip, overlay it and run it again.
The Five Mistakes That Keep You Fishless 🚫
In rough order of how much damage they do.
- Dropping on the mark you just passed. The fish were there when you saw them. You are now past them. Lead the drift, or cast back.
- Watching the screen instead of the line. The bite happens on the drop and it is subtle. Watch your line at the water.
- Fishing the bait instead of under it. Predators sit below and beside the bait, looking up. Get your jig to the bottom edge or just past it.
- Assuming your fall rate is constant. Current, line diameter, and jig shape all change it. Re-measure when conditions change, or use coloured braid and stop guessing.
- Using one depth band all day. If the screen shows fish at ninety feet and you keep working sixty, no amount of technique will save you. Set the depth from the screen, then count to it.
A Drill That Builds the Skill in One Session 🏋️
This is what I wish someone had made me do on day one. It takes about an hour and it is worth more than ten days of casual fishing.
- Pick a flat, featureless patch of bottom at a known depth. No fish needed.
- Guess the depth before you look at the screen. Then check. Repeat until your guess is close.
- Free-spool your jig and count it down to the bottom using your measured fall rate. Note when the jig actually hits bottom versus when your count said it would.
- Adjust your fall rate figure until the count and the bottom agree. Write it down.
- Now do the same thing while drifting, and deliberately lead the drift. Note whether you land up-drift, on, or past your intended spot by watching the line angle when the jig touches down.
- Repeat ten times. You will be able to feel the correct lead before the season is out.
That is it. One hour, no fish required, and you will have the two numbers that make the screen actually usable.
Quick Answers ❓
How far ahead should I cast when drift jigging?
Lead distance equals drift speed in feet per second multiplied by fall time in seconds. At half a knot and a thirty second fall, that is roughly twenty-five feet. Measure your own fall rate and the number becomes reliable.
Why do I see fish on the screen but never catch them?
Three usual reasons. You are dropping after the boat has passed the fish, you are fishing the bait cloud instead of the bottom edge of it, or your jig is not reaching the depth the fish are actually holding at. Fix those in that order.
Can I use a baitcaster for jigging?
Yes, and for shallow to medium water where you are casting to scattered marks it is often the better tool. You get more accurate casts and you can feather the fall with your thumb. Deep vertical work suits a small overhead reel better.
What is the best way to know how deep my jig is?
Coloured braid with markings every ten metres. It turns a guess into a measurement, and unlike counting seconds it stays accurate when current slows your fall.
Does a wider sonar cone help?
It helps you find fish and it hurts you place a jig on them. Wide cone for searching, narrow cone for catching. Most jigging is better served by the narrow, higher frequency beam.
How important is free spool smoothness?
Very. Your fall rate, and therefore your entire countdown, depends on the jig falling at its natural speed. A sticky spool quietly invalidates every number you have measured.
Should I turn off automatic sensitivity?
For learning, yes. Automatic sensitivity changes the picture constantly, which makes it impossible to compare one spot with another or to judge whether a return is a fish or noise.
Close the Loop Between Screen and Spool 🔄
Here is the whole article in one paragraph. Your fish finder tells you where the fish were, when you saw them, somewhere inside a cone that gets wider with depth. Your reel determines how long it takes your jig to get down there and whether you can feel the bite when it arrives. The drift, the fall rate, and the cone width are the three variables that sit between the picture and the fish, and once you start calculating them instead of guessing at them, the screen stops being a decoration and turns into the most powerful tool on the boat.
None of this requires expensive gear. It requires a stopwatch, a bit of arithmetic, some coloured braid, and an hour of deliberate practice over a boring patch of bottom. That is genuinely all.
I would love to hear what your measured fall rate turned out to be, and whether it was faster or slower than you assumed. Mine was slower by about thirty percent on the first jig I ever timed, and that single number changed my whole season. Tell me yours in the comments. 👇🎣
Tight lines, honest screens, and may your countdown always match the bottom. 🌊
Sources and Further Reading 📚
For anyone who wants to verify the technical content here rather than take my word for it, these are the references I actually use. Airmar publishes detailed transducer beam width specifications by frequency and model, which is the authoritative source for the cone geometry in this article rather than the rough working figures I have quoted. The International Game Fish Association publishes line class standards, drag setting guidance, and knot strength data. NOAA is the authority for United States saltwater fishing regulations, species identification, and size and bag limits, and also publishes the nautical and tidal data that makes drift planning possible. Long-running saltwater publications such as Salt Water Sportsman and Sport Fishing Magazine have covered sonar interpretation and jigging technique for decades. All fall rate figures in this article are the author's own measurements taken with personally owned gear in calm water and should be treated as indicative rather than laboratory grade.





Leave a comment